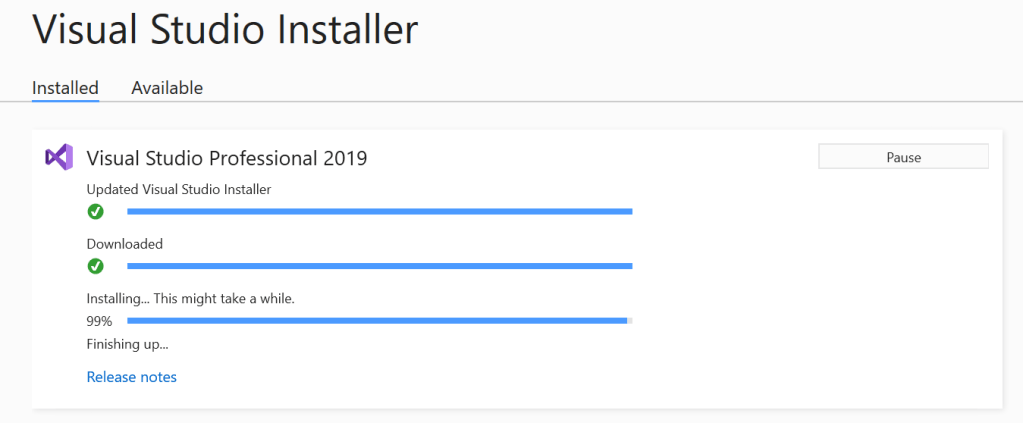
Recently MS has introduced Visual Studio 2017/2019 as new development IDE for x++ development instead of Visual Studio 2015, and therefore we started noticing DevToolsService update script failing for some development or build machines when applying quality updates from Lifecycle services.
When I downloaded the deployment log compressed file, I noticed it is missing details related to the step being applies, so I tried applying Step 30 script on the vm manually:
A new feature has been added to Release 10.0.21 to Email parameters to configure email throttling by email provider for both Exchange and SMTP providers. This feature limits number of outgoing emails per minute.
The default is set to 30 email per minute which makes sense to Exchange and Office 365 email providers as this is the maximum number of emails per minute Exchange will allow you to send emails out.
For SMTP provider, depending on the service the maximum number of emails sent out per minute can vary, but for sure it is more than 30. So remember to configure it correctly if you have a batch process that send out emails out of Dynamics 365.
In this blog I will list some new features introduced by PU 10.0.21 that have great impact on the application performance as will as new form grid control feature. Another exciting feature is the form layout view that allows you to switch between standard and custom views.
Release to warehouse
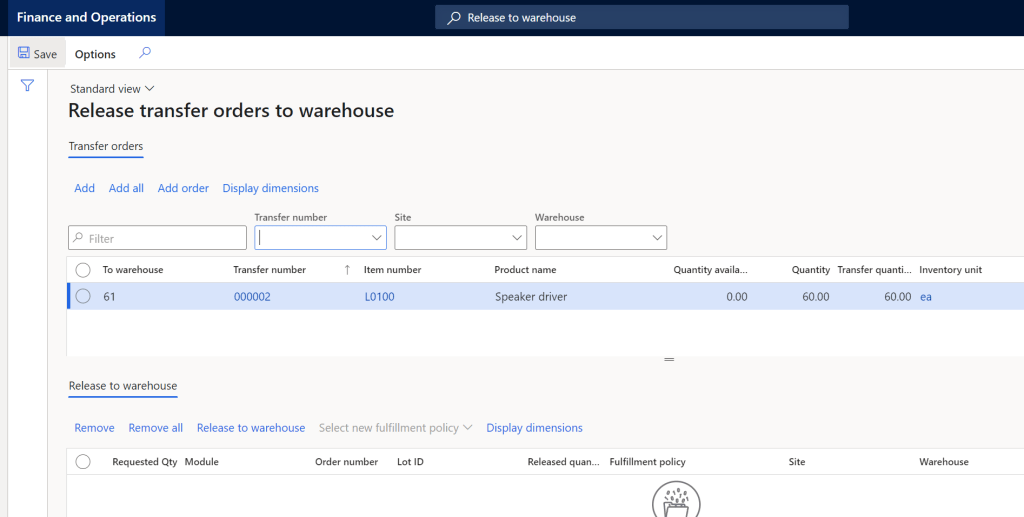
MS has introduced two new enhanced Release to warehouse forms for sales orders and transfer orders, these forms represent a significant performance improvement over existing “Release to warehouse” form. Beside decoupling sales orders from transfer orders, new much needed improved queries to calculate and retrieve 1000s of lines in about 2 seconds or under.
The location of these forms:
Warehouse management > Release to warehouse > Release sales orders to warehouse
Warehouse management > Release to warehouse > Release transfer orders to warehouse
The enhanced form grid control brings improved line entry which allows to enter data in the first row then move on to enter data in the next one while its working in the background to run logic and execute validations at the same time for the previous row. If there is an issue with the previous row you will get a popup message to fix data in the previous row (Processing has stopped because of a validation issue. Go to row with issue”, when you click on Go to row with issue link it will take you to the row with error.
This is a game changer in Dynamics 365 regarding data entry speed, the user will focus on entering data and move to next row while the application in the background processing the entry and saving to database.
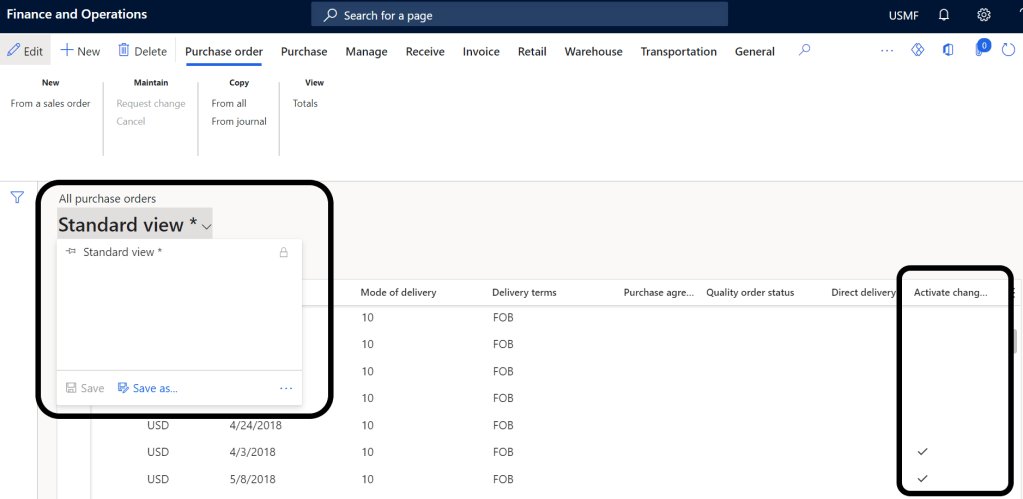
Standard View and personalization
Some users personalize forms layouts. For example, you can add/hide a field control, or re-order controls on the form…etc.
When you open any form in 10.0.22 first thing to notice next to the form title is the “Standard/My view” option. What this does is allows the user to switch between personalized and standard for layout.
In this example I have added “Activate change management” field to the purchase orders grid, then saved the view:
After personalizing the form layout you can save the new view and also have the option to make it the default view every time you access the form:
After saving the view, you have option to switch between standard and custom form layout:
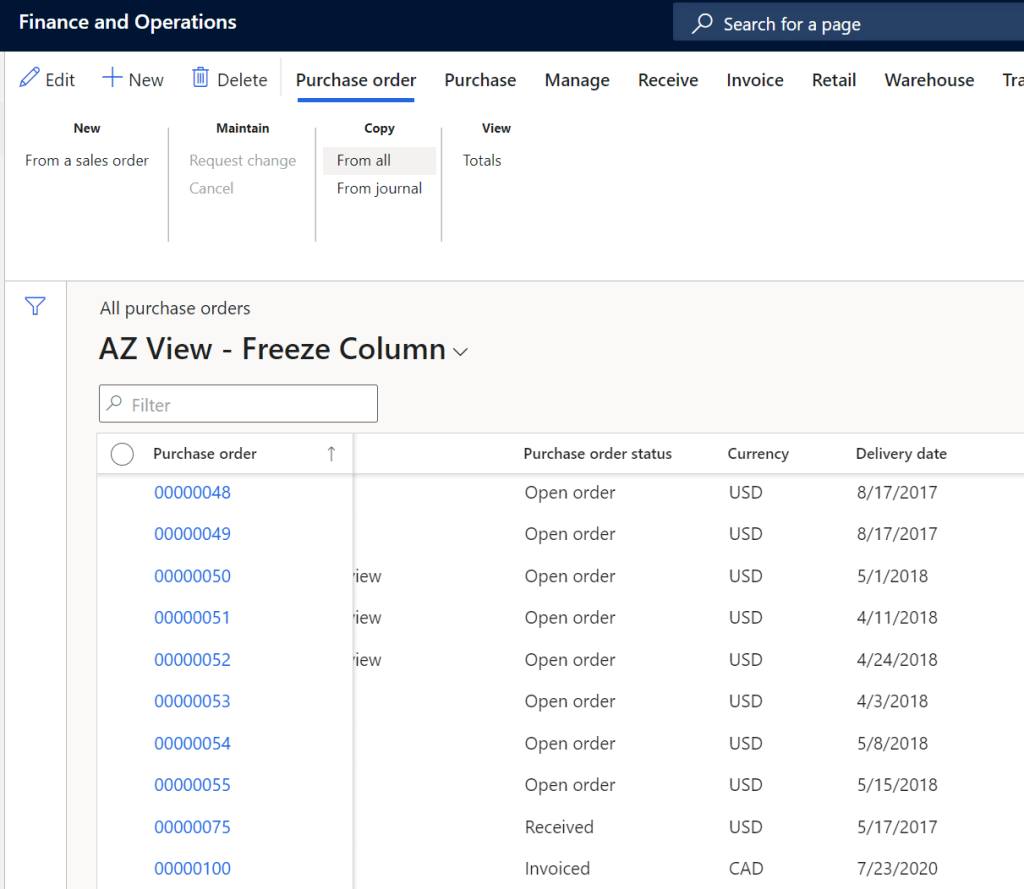
Freeze column – Grid
Another exciting feature is the “Freeze column” which allows the user (Just like Excel) to select a column to be always visible when then scroll to the side:
Group by Column – Grid
This feature allows you to select a column to display rows grouped by the selected column, in the example below I selected to group purchase orders by Vendor account:
Once you freeze by vendor account the grid instantly groups rows by the selected columns:
Azure Active Directory controls access to its hosted resources. External applications can request OAuth 2.0 access token from MS identity platform to access Azure resources by providing valid Azure Application Registration App Id and Secret, this application registration must be given permission to the specific resource it requires access to, otherwise Azure AD will reject the request.
As best practices, save both registration App Id and secret in Azure Key Vault to keep these information hidden and secured, for more information on using Key Vault and accessing it by code check my previous blog.
I am not going to discuss how to create Azure AD application registeration, if you need more information on this check this MS doc:
Note: when I use term password in this blog I mean: password, Azure Application Secret, Application Id ..etc. etc.
Passwords and secrets are sensitive data and must be handled with care. There are many reasons for Dynamics 365 F&O application require use of passwords or secrets, i.e. generate file on demand and automatically place it under Azure blob storage or secure FTP, or access external API services in real time ..etc. etc..
Key Vault
In this blog we are not talking about recurring integrations scenario, for recurring integrations we would use other Azure integrations tools such as LogicApps or MS Flow to orchestrate integrations.
Microsoft has built in functionality in Dynamics F&O allows to access passwords stored in Azure Key Vault using x++. Azure Key Vault enabled storage of password, secrets, keys, certificates etc. etc.. Think of it as secure Azure cloud password manager.
Here is a list of benefits of using Key Value to store password:
Password Security: passwords are secured and protected when stored in Azure Key Vault.
Password Control: passwords can be updated in Azure Key Vault. This means applications using the key vault will get the updated password.
Key Vault is almost free ($0.03/10,000 transactions)!
Create Azure Key Vault
Login Azure Portal https://portal.azure.com/ and search for Key vault. Make sure to click on the Key Vault Icon
Click on Create key vault button:
Create Key Vault
Fill the required fields:
Subscription: Select valid subscription account such as VSE subscription.
Resource group: Select proper resource group or just enter a new name to create new resource group.
Key vault name: it must be unique key vault name.
Region: Choose region.
Pricing Tier: for this demo I will use standard.. For implementation it is preferred to use Premium for additional features.
I left other options to defaults.
Click on Review + Create button.
Create Key Vault
Click Create button.
Create Key Vault
Give it a few moments to create the resource.
Click Go to resource button.
Key Vault Created
Assign Azure Client Application to access Key Vault
To access Azure key vault you need to create App registration under Azure Active Directory.
I will not demonstrate how to create app registration in Azure, if you need guidance follow this link:
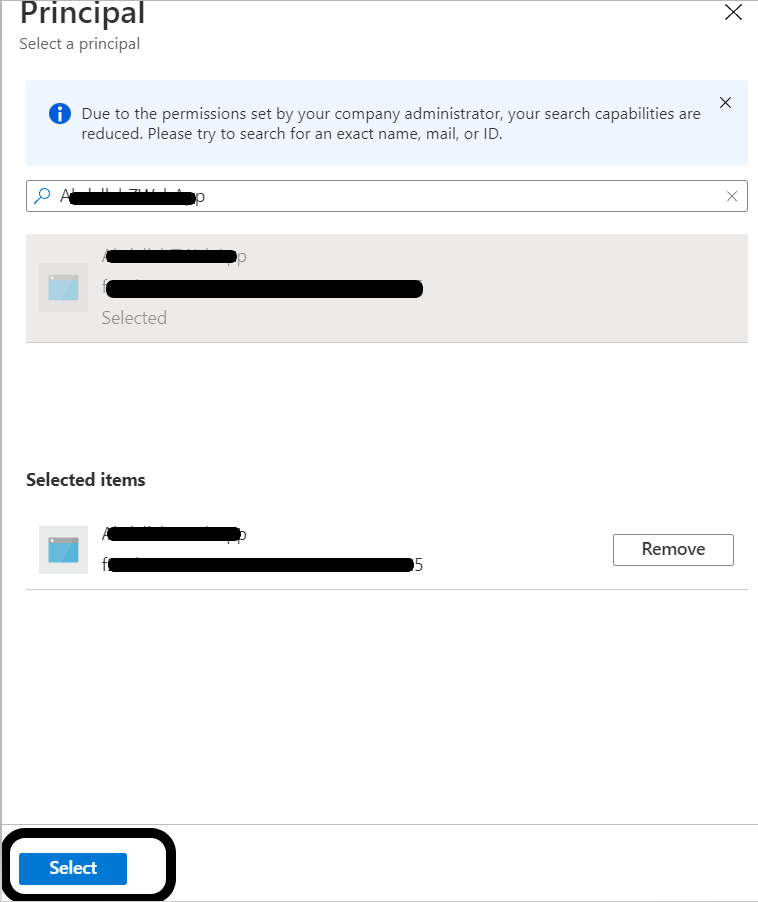
In the search box, type the name of the app registration or enter the app Id. From the search results select the App registration, then click Select button:
Select Azure App registration
Click Add button:
Add Azure App registration to the Key Vault
From Secret permission drop down, select Get and List, then click Add button:
Select App Registration permissions to Key Vault
Add Password/Secret to Key vault
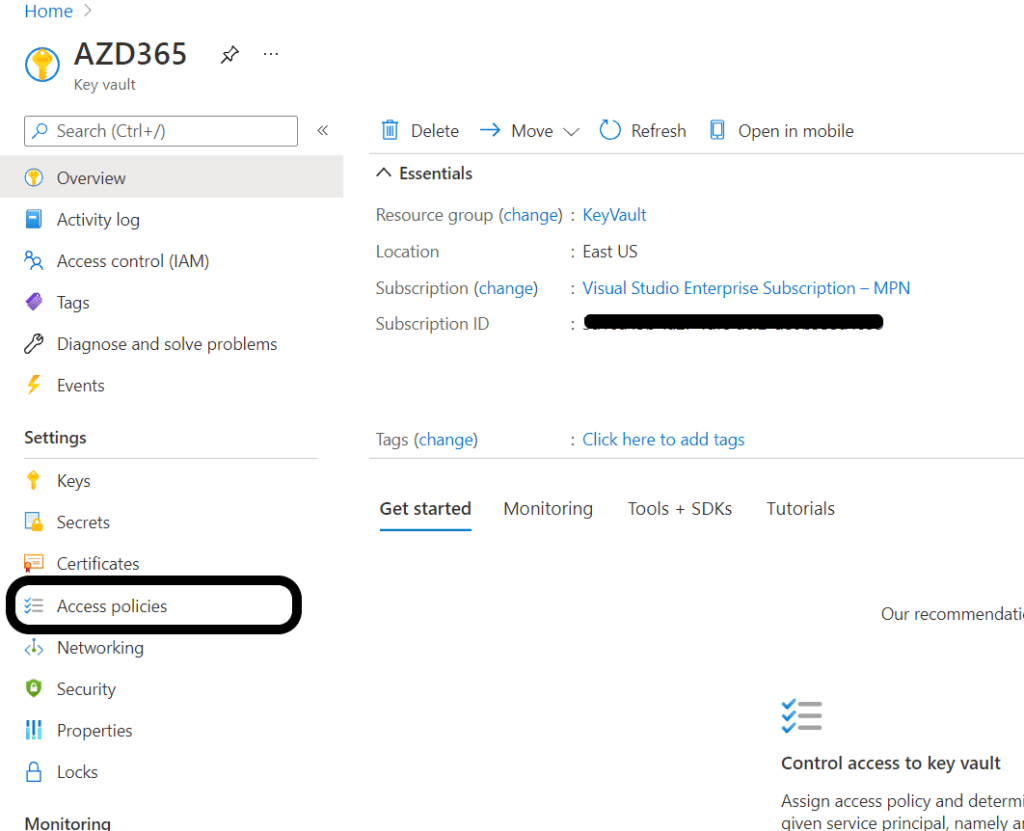
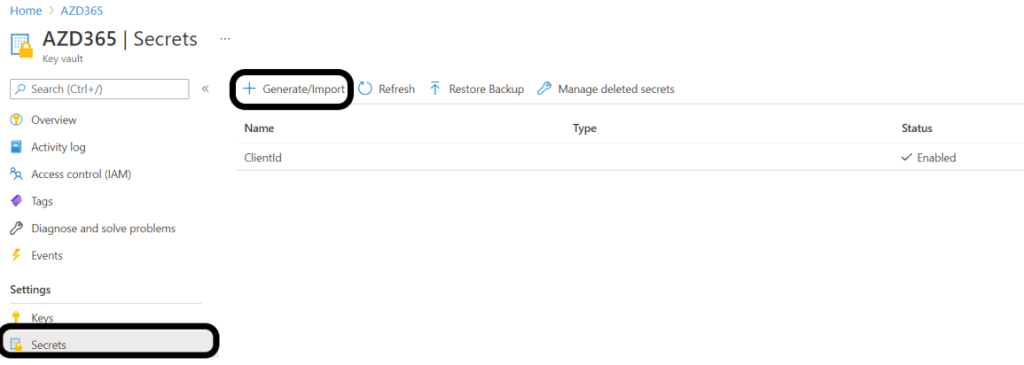
Under Key Vault menu, select Secrets, then click on +Generate/Import button:
Add Secret to Azure Key Vault
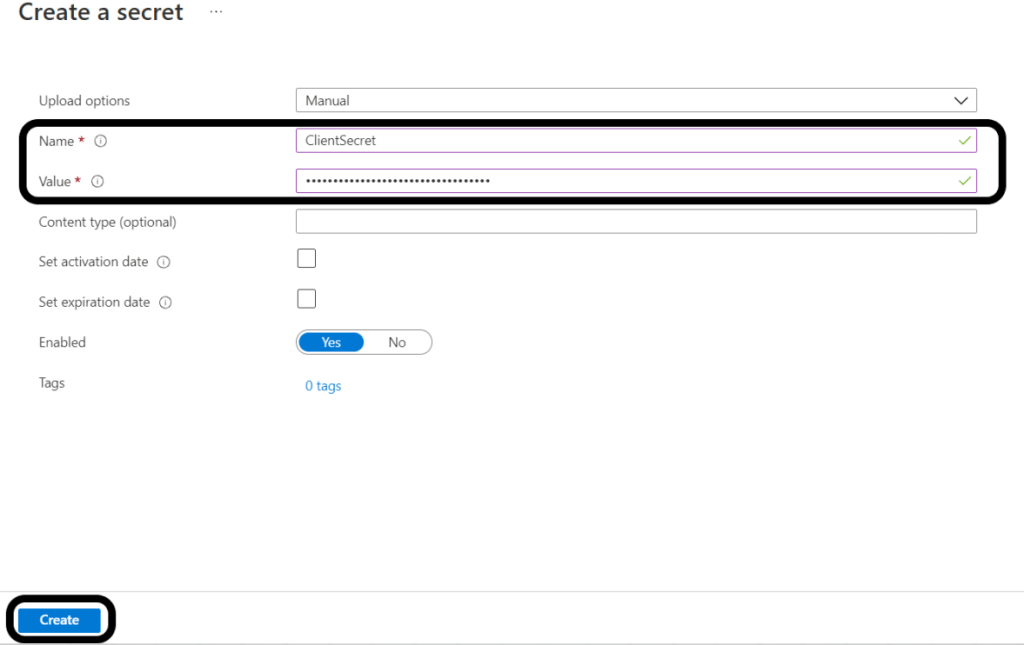
Enter the following:
Name: This name will be used to fetch the secret from D365 F&O
Value: the value of the App secret
Click Create button:
Add Secret to Azure Key Vault
Repeat the same for the App Id.
We are done with Azure portal, lets move to D365 F&O.
Set up MS Dynamics F&O
In D365 F&O navigate to
System administration > Setup > Key Vault parameters:
Click on New button and enter the following:
Name, Description: up to you what you want to call the key vault in D365 F&O
Key Vault URL: this must be copied from the Azure portal
Key Vault client: this is the App registeration that has access to the Key Vault.
Key Vault secret key: the secret of the App registeration used to access the Key Vault.
Under Secrets, click + Add button to add the secrets/passwords stored in the Key Vault:
Name: Must be unique
Secret: you must use the following format: vault://<KeyVaultName>/<SecretName>
<KeyVaultName>: This is optional and can be ignored.
Secret type: Manual
Click validate to ensure your entries are valid.
Key Vault Parameters
To use the Key Vault secrets by code use the following snippet:
if you are looking to work with certificate files, you first need to activate this option in System parameters:
System administration > Setup > System Parameters: under General tab, set Use advanced certificate store to yes:
In Azure portal you need to follow steps listed in this MS link to upload the certificate (pfx) file using PowerShell script. The steps here are a bit vague and I did not get a chance to test uploading certificate then call it from D365 F&O:
Today, I stumbled upon an issue with the development environment having IISExpress crashing and no one was able to browse D365 F&O environment.
By default IISExpress starts automatically when opening visual studio (yes, I know we can change the default to IIS by modifying DynamicsDevConfig.xml) acting as the host of the D365 F&O application.
By checking Event Viewer logs and found that AxDB LOG file size has grown dramatically and the drive hosting it ran out of space.
Event Viewer
AX is shutting down due to an error. Error during initialization of Message Broker. Please verify that your AOS instance has connection to the AOS Database. Error messages follow: Could not execute operation against the SQL Database. The transaction log for database ‘AxDB’ is full due to ‘LOG_BACKUP’. Exception details: System.Reflection.TargetInvocationException: Exception has been thrown by the target of an invocation. —> Microsoft.Dynamics.Ax.Xpp.Messaging.MessageBrokerStartupException: Could not execute operation against the SQL Database. —> System.Data.SqlClient.SqlException: The transaction log for database ‘AxDB’ is full due to ‘LOG_BACKUP’. at System.Data.SqlClient.SqlConnection.OnError(SqlException exception, Boolean breakConnection, Action`1 wrapCloseInAction) at System.Data.SqlClient.TdsParser.ThrowExceptionAndWarning(TdsParserStateObject stateObj, Boolean callerHasConnectionLock, Boolean asyncClose) at System.Data.SqlClient.TdsParser.TryRun(RunBehavior runBehavior, SqlCommand
MSSQL Logs Drive:
MSSQL Logs Drive
Resolution
To clear up disk space we need to shrink DB Log size. This can be done in various ways:
Stop AOS and IIS services
Restart SQL Server Service
Or Right Click the database name and choose: Tasks > Shrink > File
Or Use of DBCC SHRINKFILE command (best option)
To get the temp log files names, run the following SQL select statement:
SELECT name, file_id, type_desc, size * 8 / 1024 [TempdbSizeInMB]
FROM tempdb.sys.database_files
WHERE type_desc = 'Log'
ORDER BY type_desc DESC, file_id
Using the output from the select statement, execute DBCC SHRINKFILE command for each file:
use tempdb
Go;
DBCC SHRINKFILE(templog, 10);
If the DBCC command is not decreasing the file size try clearing the plan cache:
PDFSharp utility is a common tool to edit PDF documents in D365 used by many ISVs and partners, some customers noticed an issue after upgrading their system to 10.0.19 PU. For example when using the tool to merge PDF documents, the following error is thrown:
Cannot handle iref streams. The current implementation of PDFsharp cannot handle this PDF feature introduced with Acrobat 6.
This issue is only happening in Sandbox (T2 and up) and Production environments, Tier 1 environments is not affected.
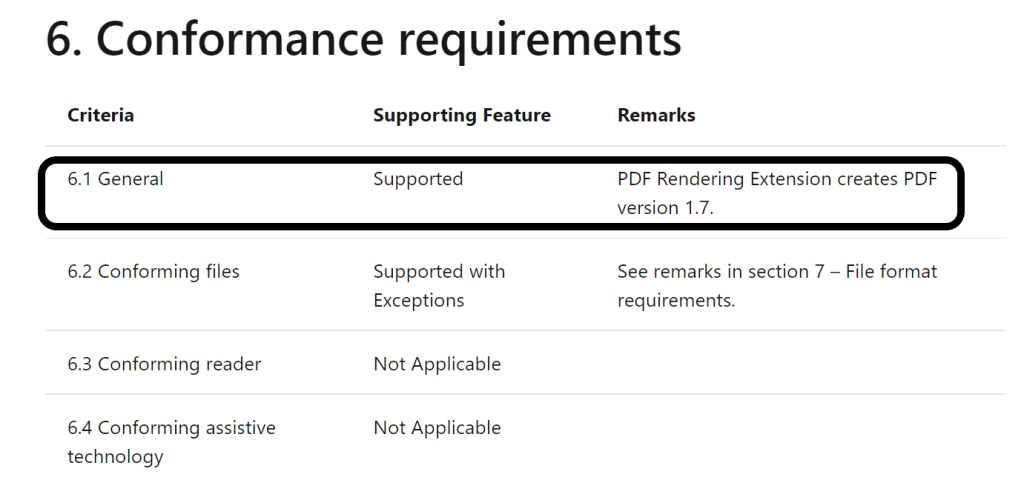
Microsoft explained to us that this issue is related to recent upgrade on MS controlled instances (Sandbox and Production instance), the PDF file version changed from 1.3 to 1.7 because of the SSRS version upgraded from SSRS2016 to SSRS2019.