D365 SCM’ Vendor Collaboration portal enables external vendors to access related purchase orders, invoices, consignment inventory, and requests for quotation information.
If you are new to Vendor Collaboration portal, I advise you to start here. This topic discusses how to enable Gmail accounts to access Vendor Collaboration Portal.
Set up and maintain vendor collaboration.
Not all vendors use Microsoft 365 accounts and therefore use their personal email accounts to sign up for and access Vendor Collaboration portal. As you might know this is not supported officially. If you followed steps listed here using Gmail accounts, you will receive this error.
You are not authorized to login with your current credentials
To enable Gmail (or other non-Microsoft accounts) accounts to access Vendor Collaboration portal, you need to sign up to create Microsoft account for these personal accounts. Below I will show you how can achieve that in simple steps:
For Gmail accounts you DO NOT need to invite them to Azure Portal as guest accounts when you create Microsoft account for them.
Enter your personal accounts, then click Next button.
Signup for Microsoft accounts
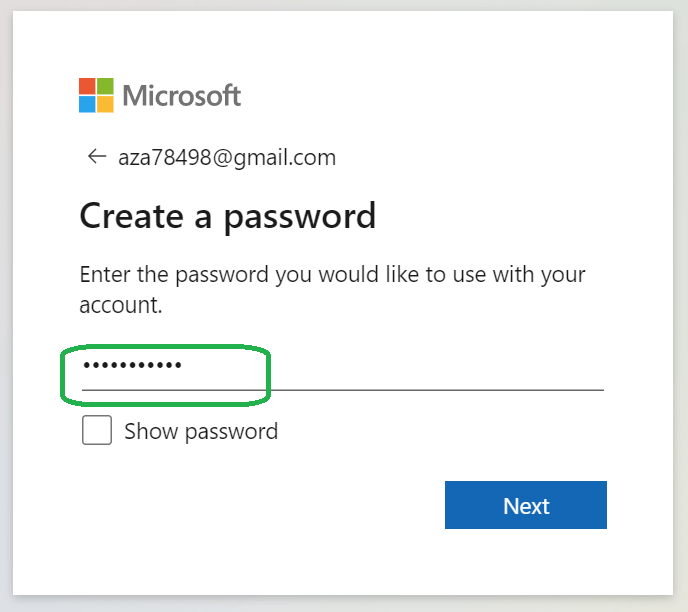
Create password that you can use to access your Microsoft account later (this is different that your personal account password), then click Next button.
Signup for Microsoft account
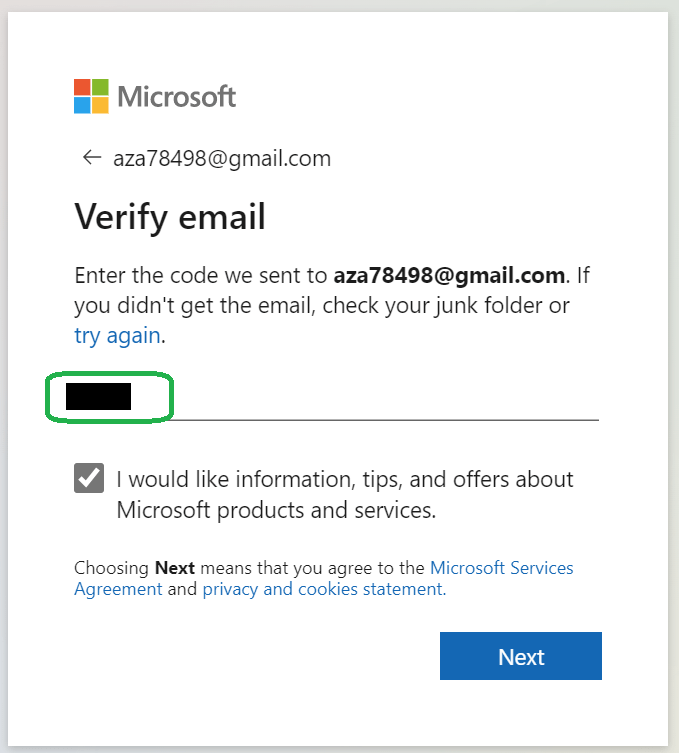
After this point Microsoft account service should send you verification email including security code you will need to use to verify your personal account.
Verification email
use security code to continue signup process. Click Next button.
Verify email
You will be asked to resolve a puzzle to ensure you are not a robot. Complete it then click Next button.
Enter your Birth date and country, then click Next button.
If you recently provisioned Dynamics 365 Development environment using 10.0.29 release, you will notice Event Viewer is missing Dynamics folder.
Dynamics 365 Development Environment Event Viewer after Provisioning 10.0.29 environment.
After some research I found a solution that is shared by “Daniel Codes” he received from Microsoft Support 3 weeks ago. Find details below:
Dynamics folder missing in event viewer on CHE environment was discovered recently and it is being worked on. We expect the fix to be available some time in close future.
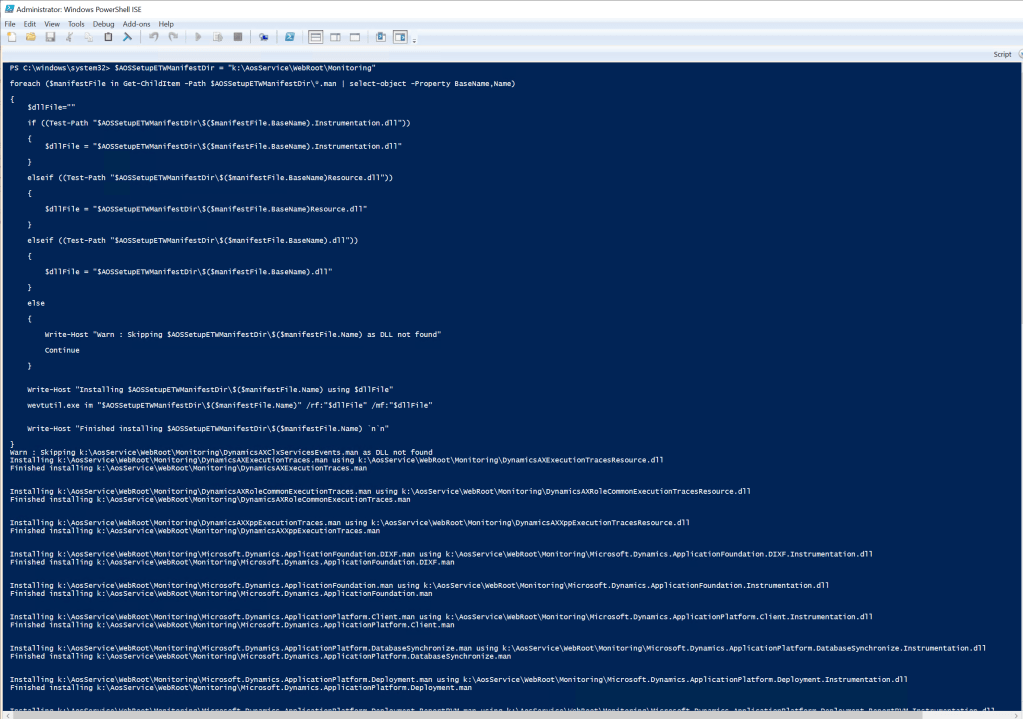
In the meantime, you can use this script to install the ETW Provider (which is what adds the event viewer Dynamics folder) attached with this mail (rename it to PS1 and run it on the VM from c:\temp folder).
Microsoft Support
While waiting on permanent fix from MS execute this PowerShell script in your development environment. Make sure you open PowerShell ISE in Administrator mode, then paste the following script and execute:
In this blog I will share with you my first impressions of latest Dynamics 365 for Finance / SCM development environment (version 10.0.28) that I have provisioned recently.
Visual Studio Professional 2019 First and foremost Visual Studio Professional 2019 is the new default development environments (Previously was VS Professional 2017 and before that VS Professional 2015).
I never provisioned D365 10.0.27 Dev environment but I think it is the first version that started using VS 2019.
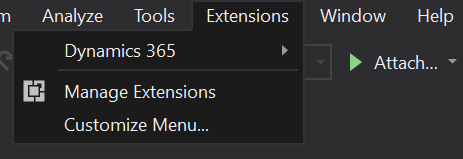
The Dynamics 365 menu that is used by x++ developers has been moved under Extensions menu:
Dynamics 365 Menu
Update Model Parameters If you tried updating model parameters (Extensions > Dynamics 365 > Model Management > Update model parameters…) You will notice a new tab (step) called select friend packages. I looked up Microsoft docs to check related documentation but found nothing about it. So I did some testing myself, the purpose of this step is to allow models referencing a specific model to access its internal artifacts. For example, if you have model X referencing model Y, then model X will appear under select friend packages tab for model Y, when you updat model Y parameters and select model X as a freind package, then model X will be able to access internal methods/classes of Y.
I created 2 models AZ Demo and AZ Demo 2, AZ Demo 2 references AZ Demo. AZ Demo added AZ Demo 2 as friend package. When I open AZ Demo descriptor files I see AZ Demo 2 added under <InternalsVisibleTo> tag.
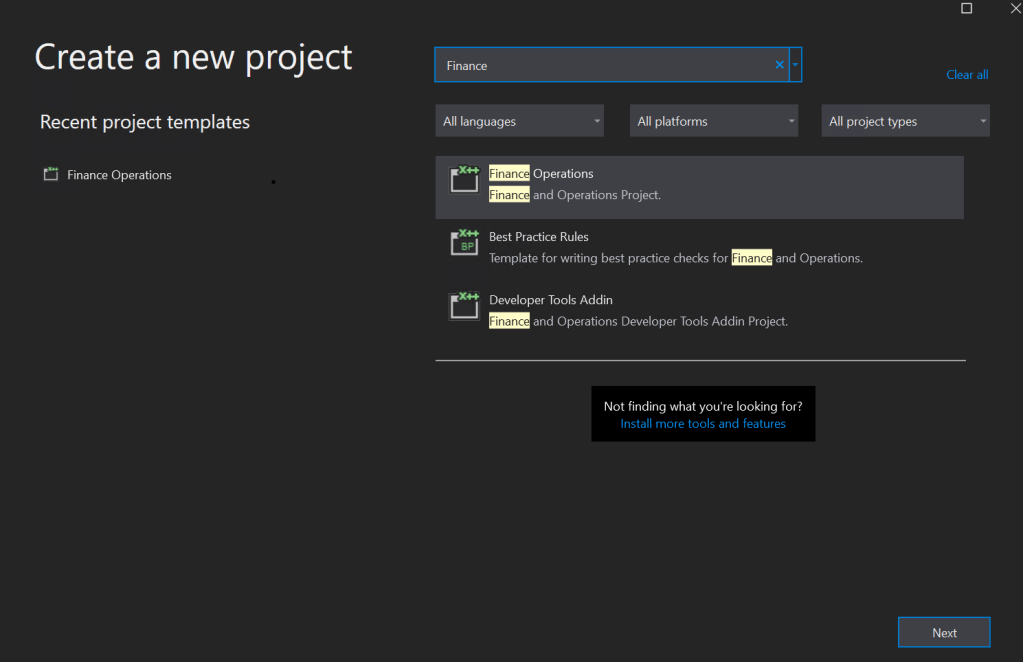
Create new project in Visual 2019 the create new project dialog has changed, ensure to enter Finance keyword to find the right project template.
Once selected, it will appear under Recent project templates on the left side for the next time you are creating new project:
Create Project
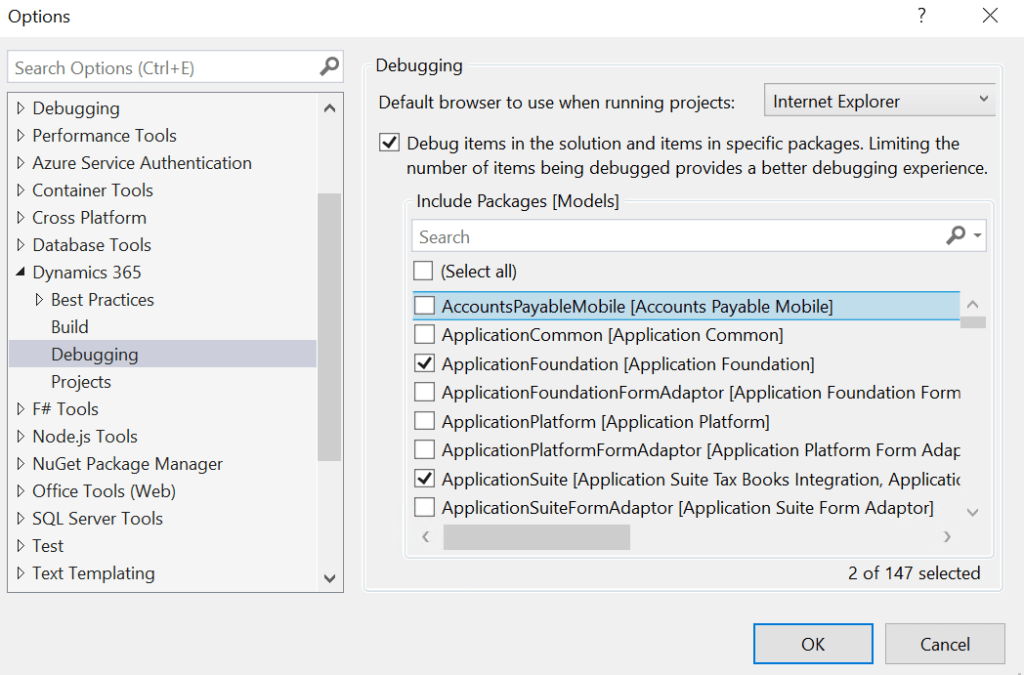
Visual Studio 2019 Debugging Options for D365 Dev Environment In VS 2019, to debug D365 code you will need to have the correct settings which can be found under: Extensions > Dynamics 365 > Options > Dynamics 365 > Debugging. Under this tab you have the option to select which packages/models you want to include in your debugging, this is newly introduced by Microsoft to speed up debugging process and avoid VS crashes.
Debug items in the solution and items in specific packages. limiting the number of items being debugged provides a better debugging experience > Include Packages:
Debugging D365 Code
As you might know in previous Visual Studio versions you had 1 option to select: “Load symbols only for items in the solution”. if the option is selected, then you can only debug current solution items’ code, if not selected then you can add breakpoint to any artifact under any package/Model.
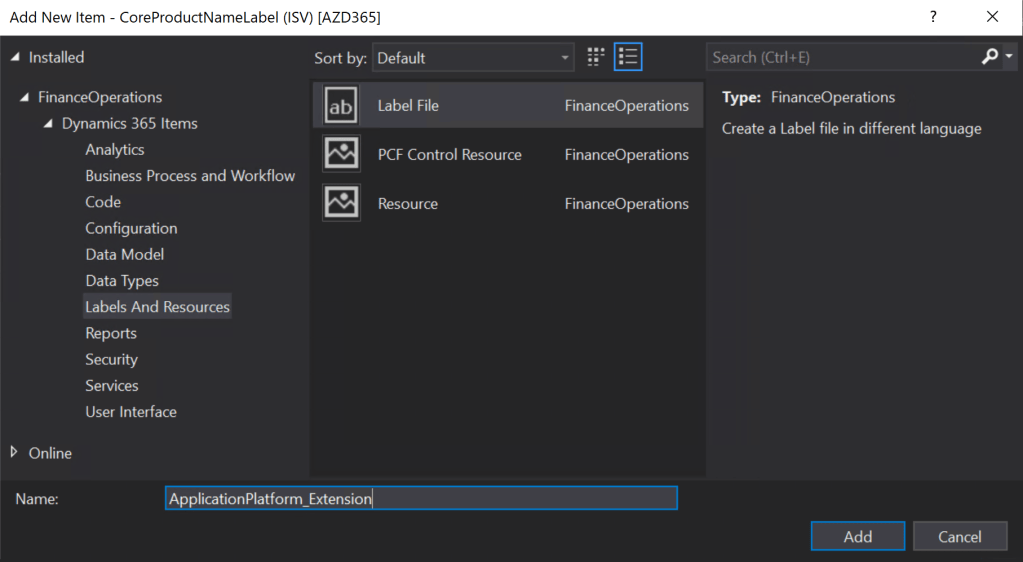
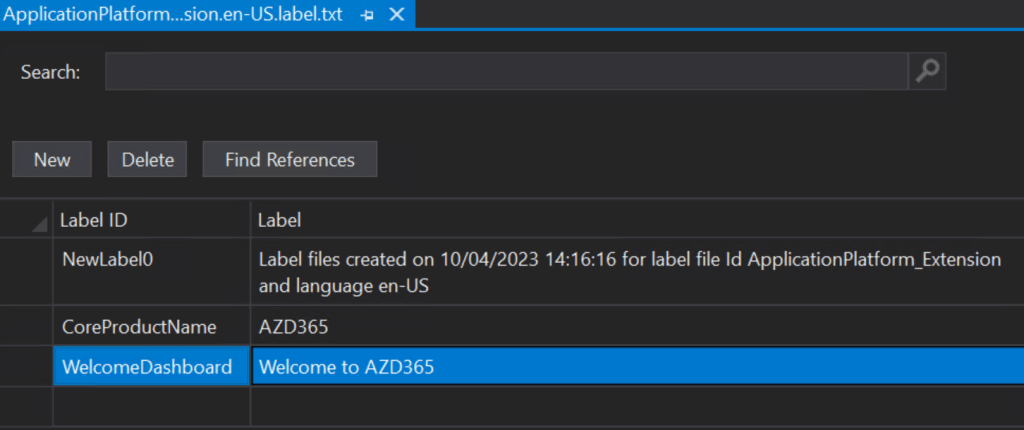
After recent development environment upgrade to 10.0.26 release, I noticed when I compile any D365 project containing label file, the label IDs in the file get re-ordered alphabetically. This is a new out of the box feature added by MS probably to enhance fetching labels.
If you want to turn this feature off/on in Visual Studio, Open Options menu by navigating to Dynamics 365 > Options…
D365 Options Menu
Click on Projects tab under Dynamics 365 menu. You will see a new option added:
Recently I was looking into cloud-hosted dev environment upgrade issue on Step 25. This step performs 2 main activities:
Report Deployment
Database Sync
I downloaded execution log file and started investigating Step 25 issue by looking in Step25UpdateReports_############.log under RunbookExecution folder. I noticed multiple reports errored out, I searched by one of the reports names in the log and found this error:
Publish-AXReport : An error occurred while deploying the report BankDepositbyCustomer.Report, PersonnelManagement.
This might be because the SQL Server Reporting Services has not been installed, or is not configured correctly.
At K:\AosService\PackagesLocalDirectory\Plugins\AxReportVmRoleStartupTask\Reporting.psm1:503 char:9
+      Publish-AXReport -MaxDegreeOfParallelism 1 -ErrorAction Conti …
Something seemed odd with this report, so I searched for the report in Application Explorer and noticed that BankDepositbyCustomer report does not belong to PersonnelManagement model! it belongs to a different model.
Solution: Since the report is not part of PersonnalManagement model, I opened K:\AosService\PackagesLocalDirectory\PersonnalManagement\Reports folder and removed unrelated .rdl files. I repeated the same for couple more models and this did the trick.
To post packing slip using custom PackingSlipId value against sales order and use custom value to set PackingSlipId you will need to follow these steps.
As you know PackingSlipId is set by the system using Number Sequence.
After digging I found a safe way pass custom PackingSlipId value. first, extend SalesFormLetterContract class to accept custom PackingSlipId:
[ExtensionOf(classStr(SalesFormLetterContract))]
final class AZSalesFormLetterContract_extension

private Num AZOverridePackingSlipId;

[DataMemberAttribute]
public Num parmAZOverridePackingSlipId(Num _overridePackingSlipId = AZOverridePackingSlipId)
{
    AZOverridePackingSlipId = _overridePackingSlipId;
    return AZOverridePackingSlipId;
}
Then extend SalesPackingSlipJournalCreate class object to set PackingSlipId
[ExtensionOf(classStr(SalesPackingSlipJournalCreate))]
public final class AZSalesPackingSlipJournalCreate_Extension

/// <summary>
/// Initializes non-correctable fields on the journal header.
/// </summary>
public void initHeader()
{
    next initHeader();

    SalesFormLetterContract contract = this.parmInterCompanyFormletterContract();

    if (contract.parmAZOverridePackingSlipId())
    {
        custPackingSlipJour.PackingSlipId = contract.parmAZOverridePackingSlipId();
    }
}
All set!
Now initialize SalesFormLetter object, then get SalesFormLetterContract and pass custom PackingSlipId value:
Finally, on CustPackingSlipSalesLink table there is unique index that includes following fields: SalesId, DeilveryDate and PackingSlipId. before overriding PackingSlipId with custom value, ensure you are not breaking that index, otherwise you will get an error.
A new feature has been added to Release 10.0.21 to Email parameters to configure email throttling by email provider for both Exchange and SMTP providers. This feature limits number of outgoing emails per minute.
The default is set to 30 email per minute which makes sense to Exchange and Office 365 email providers as this is the maximum number of emails per minute Exchange will allow you to send emails out.
For SMTP provider, depending on the service the maximum number of emails sent out per minute can vary, but for sure it is more than 30. So remember to configure it correctly if you have a batch process that send out emails out of Dynamics 365.
Note: when I use term password in this blog I mean: password, Azure Application Secret, Application Id ..etc. etc.
Passwords and secrets are sensitive data and must be handled with care. There are many reasons for Dynamics 365 F&O application require use of passwords or secrets, i.e. generate file on demand and automatically place it under Azure blob storage or secure FTP, or access external API services in real time ..etc. etc..
Key Vault
In this blog we are not talking about recurring integrations scenario, for recurring integrations we would use other Azure integrations tools such as LogicApps or MS Flow to orchestrate integrations.
Microsoft has built in functionality in Dynamics F&O allows to access passwords stored in Azure Key Vault using x++. Azure Key Vault enabled storage of password, secrets, keys, certificates etc. etc.. Think of it as secure Azure cloud password manager.
Here is a list of benefits of using Key Value to store password:
Password Security: passwords are secured and protected when stored in Azure Key Vault.
Password Control: passwords can be updated in Azure Key Vault. This means applications using the key vault will get the updated password.
Key Vault is almost free ($0.03/10,000 transactions)!
Create Azure Key Vault
Login Azure Portal https://portal.azure.com/ and search for Key vault. Make sure to click on the Key Vault Icon
Click on Create key vault button:
Create Key Vault
Fill the required fields:
Subscription: Select valid subscription account such as VSE subscription.
Resource group: Select proper resource group or just enter a new name to create new resource group.
Key vault name: it must be unique key vault name.
Region: Choose region.
Pricing Tier: for this demo I will use standard.. For implementation it is preferred to use Premium for additional features.
I left other options to defaults.
Click on Review + Create button.
Create Key Vault
Click Create button.
Create Key Vault
Give it a few moments to create the resource.
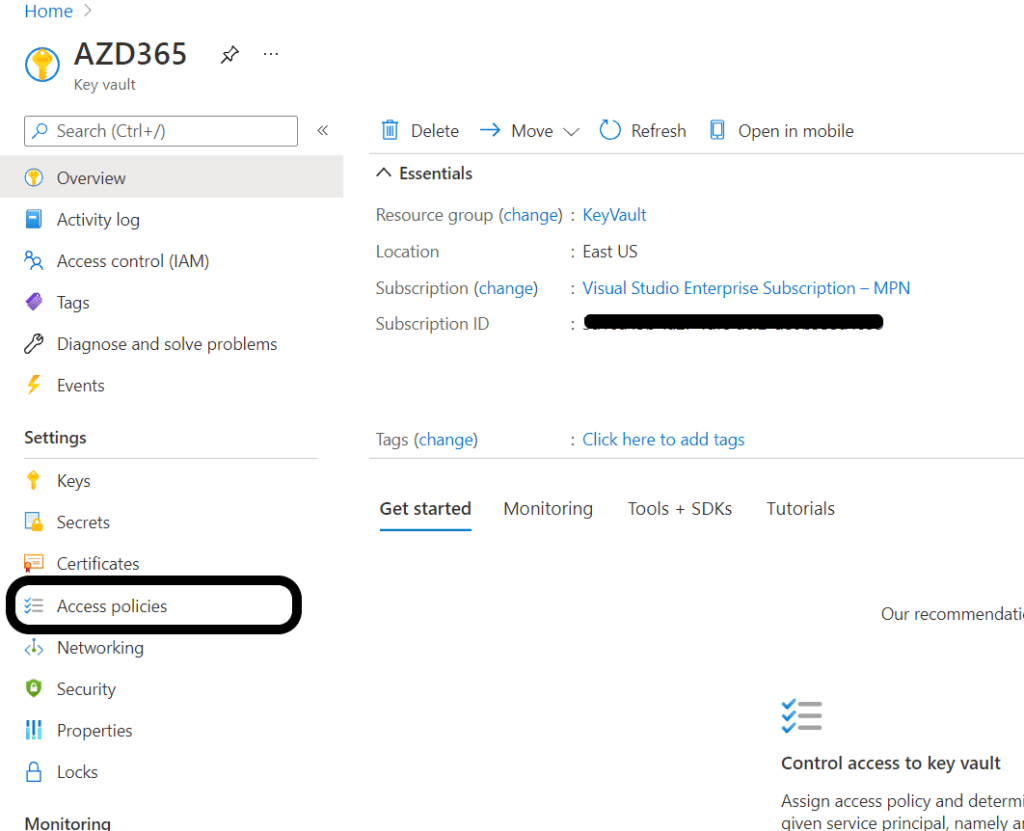
Click Go to resource button.
Key Vault Created
Assign Azure Client Application to access Key Vault
To access Azure key vault you need to create App registration under Azure Active Directory.
I will not demonstrate how to create app registration in Azure, if you need guidance follow this link:
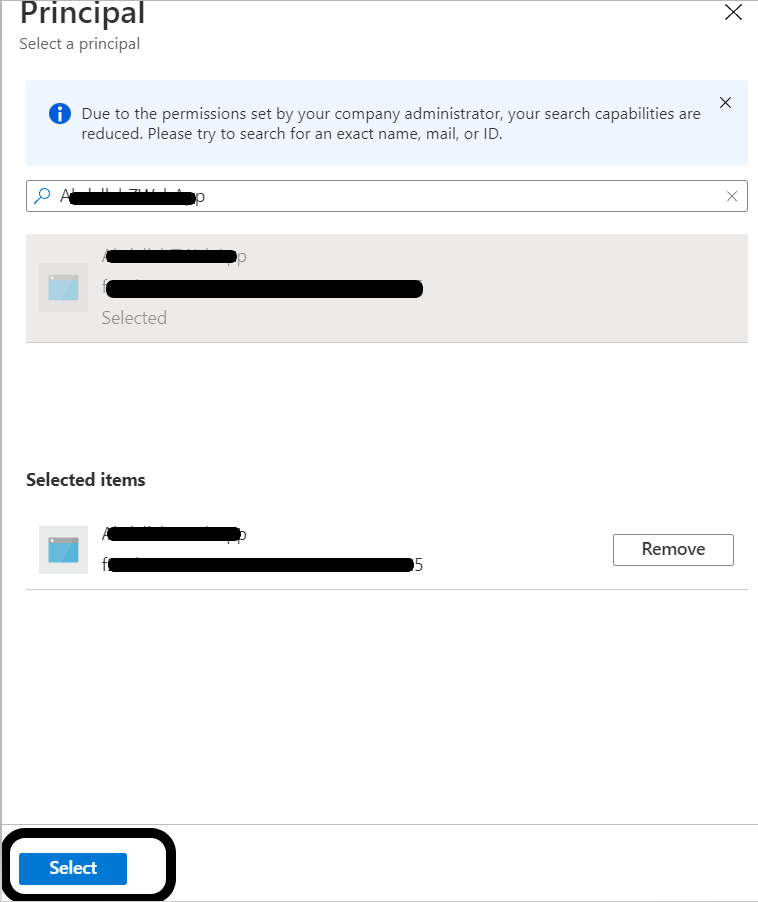
In the search box, type the name of the app registration or enter the app Id. From the search results select the App registration, then click Select button:
Select Azure App registration
Click Add button:
Add Azure App registration to the Key Vault
From Secret permission drop down, select Get and List, then click Add button:
Select App Registration permissions to Key Vault
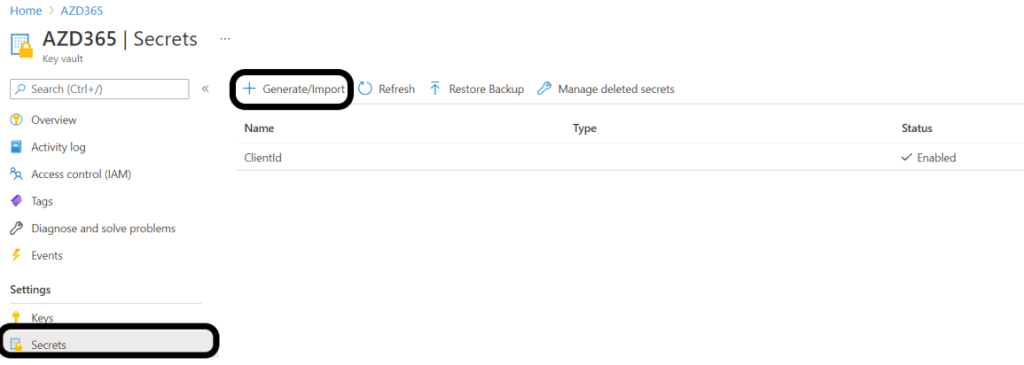
Add Password/Secret to Key vault
Under Key Vault menu, select Secrets, then click on +Generate/Import button:
Add Secret to Azure Key Vault
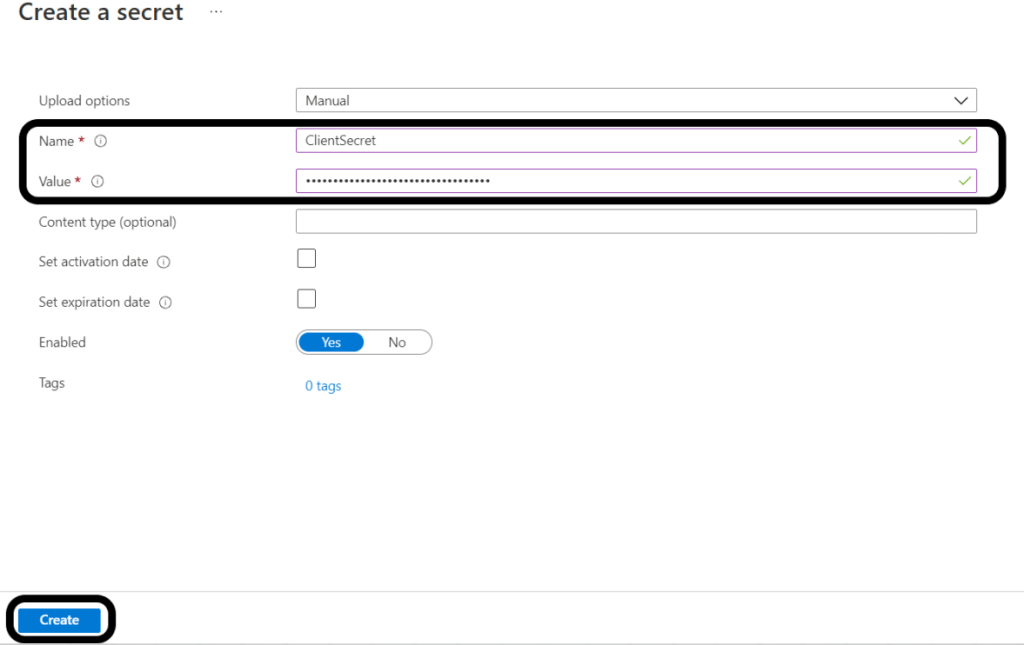
Enter the following:
Name: This name will be used to fetch the secret from D365 F&O
Value: the value of the App secret
Click Create button:
Add Secret to Azure Key Vault
Repeat the same for the App Id.
We are done with Azure portal, lets move to D365 F&O.
Set up MS Dynamics F&O
In D365 F&O navigate to
System administration > Setup > Key Vault parameters:
Click on New button and enter the following:
Name, Description: up to you what you want to call the key vault in D365 F&O
Key Vault URL: this must be copied from the Azure portal
Key Vault client: this is the App registeration that has access to the Key Vault.
Key Vault secret key: the secret of the App registeration used to access the Key Vault.
Under Secrets, click + Add button to add the secrets/passwords stored in the Key Vault:
Name: Must be unique
Secret: you must use the following format: vault://<KeyVaultName>/<SecretName>
<KeyVaultName>: This is optional and can be ignored.
Secret type: Manual
Click validate to ensure your entries are valid.
Key Vault Parameters
To use the Key Vault secrets by code use the following snippet:
if you are looking to work with certificate files, you first need to activate this option in System parameters:
System administration > Setup > System Parameters: under General tab, set Use advanced certificate store to yes:
In Azure portal you need to follow steps listed in this MS link to upload the certificate (pfx) file using PowerShell script. The steps here are a bit vague and I did not get a chance to test uploading certificate then call it from D365 F&O:
Today, I stumbled upon an issue with the development environment having IISExpress crashing and no one was able to browse D365 F&O environment.
By default IISExpress starts automatically when opening visual studio (yes, I know we can change the default to IIS by modifying DynamicsDevConfig.xml) acting as the host of the D365 F&O application.
By checking Event Viewer logs and found that AxDB LOG file size has grown dramatically and the drive hosting it ran out of space.
Event Viewer
AX is shutting down due to an error. Error during initialization of Message Broker. Please verify that your AOS instance has connection to the AOS Database. Error messages follow: Could not execute operation against the SQL Database. The transaction log for database ‘AxDB’ is full due to ‘LOG_BACKUP’. Exception details: System.Reflection.TargetInvocationException: Exception has been thrown by the target of an invocation. —> Microsoft.Dynamics.Ax.Xpp.Messaging.MessageBrokerStartupException: Could not execute operation against the SQL Database. —> System.Data.SqlClient.SqlException: The transaction log for database ‘AxDB’ is full due to ‘LOG_BACKUP’. at System.Data.SqlClient.SqlConnection.OnError(SqlException exception, Boolean breakConnection, Action`1 wrapCloseInAction) at System.Data.SqlClient.TdsParser.ThrowExceptionAndWarning(TdsParserStateObject stateObj, Boolean callerHasConnectionLock, Boolean asyncClose) at System.Data.SqlClient.TdsParser.TryRun(RunBehavior runBehavior, SqlCommand
MSSQL Logs Drive:
MSSQL Logs Drive
Resolution
To clear up disk space we need to shrink DB Log size. This can be done in various ways:
Stop AOS and IIS services
Restart SQL Server Service
Or Right Click the database name and choose: Tasks > Shrink > File
Or Use of DBCC SHRINKFILE command (best option)
To get the temp log files names, run the following SQL select statement:
SELECT name, file_id, type_desc, size * 8 / 1024 [TempdbSizeInMB]
FROM tempdb.sys.database_files
WHERE type_desc = 'Log'
ORDER BY type_desc DESC, file_id
Using the output from the select statement, execute DBCC SHRINKFILE command for each file:
use tempdb
Go;
DBCC SHRINKFILE(templog, 10);
If the DBCC command is not decreasing the file size try clearing the plan cache: